Personal Zoom Room with the Poly Studio x30

Introduction

It was late 2019 when I started looking for a telepresence device for Zoom that was an all in one device. I was looking for something that would give a great all around audio/video/sharing experience but also have a quick way of integrating into your calendar for a “one button to join” experience. I contacted one of our company’s partners and they sent me the Poly Studio x30 to try out. What a great solution! Not only did it integrate for Zoom Rooms, but the hardware runs on Poly Video OS. It supports other vendors in case you would switch to another unified collaboration provider like Microsoft Teams or Cisco Webex. Not only did this seem like a no brainer for Zoom, but it was future proof for other providers. Let’s take a dive into setting up a Personal Zoom Room with the Poly Studio x30.

Poly Studio Series

The Poly Studio series falls under their group of video conferencing solutions. They offer a variety of devices starting with USB connected devices all the way up to full standalone devices for a room system. The device I have is the Poly Studio x30, ideal for a small huddle room or office.

personal-zoom-room-poly-studio

Personal Zoom Room

I setup the Poly Studio x30 as a Personal Zoom Room so I could integrate my calendar for the one button to join experience. Here’s a quick guide on how to set it up, please keep in mind I’m demonstrating from a paid Zoom Enterprise account with Zoom Rooms.

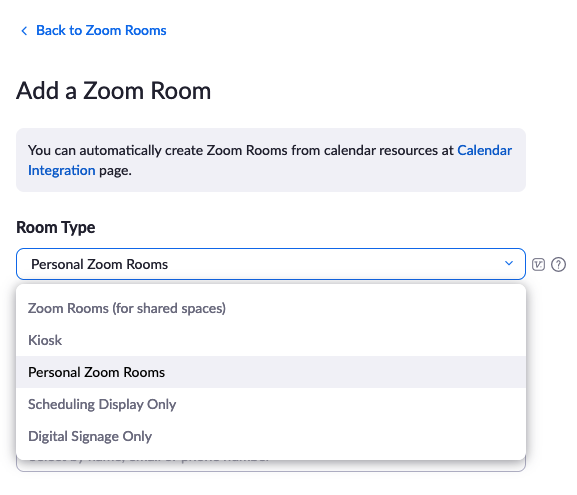
Since Zoom organizes Rooms into Buildings and then Floors, I created a Building called Personal and a Room called Personal Zoom Rooms. Add the Personal Zoom Room from your Admin portal in order to manage it for your account. I created it with my name in order to personalize it.

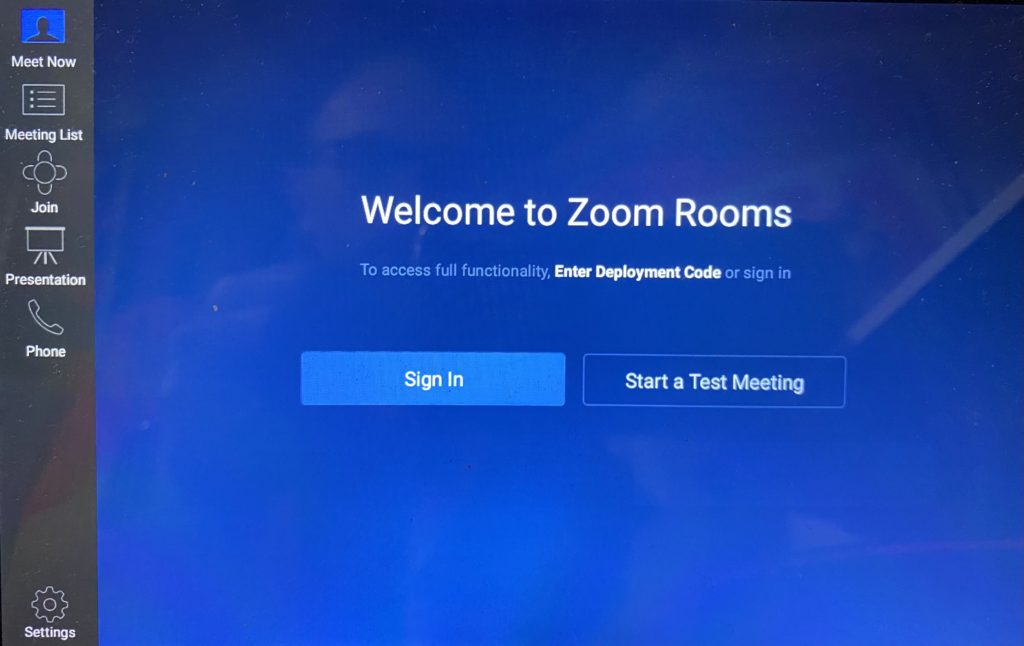
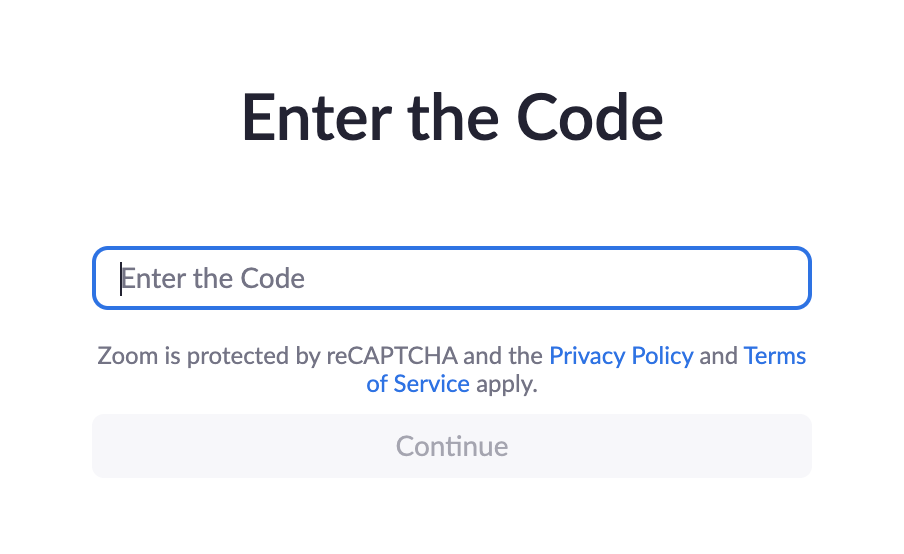
Next was to pair the Poly Studio x30 with Zoom. You can do this by going to zoom.us/pair (it will ask you to sign into your account if you aren’t signed in). On the TC8 touch panel, select Sign In – use the registration code displayed to enter into your web browser to pair it with your Zoom account. Select the name of the Zoom Room you created to add your hardware to it.
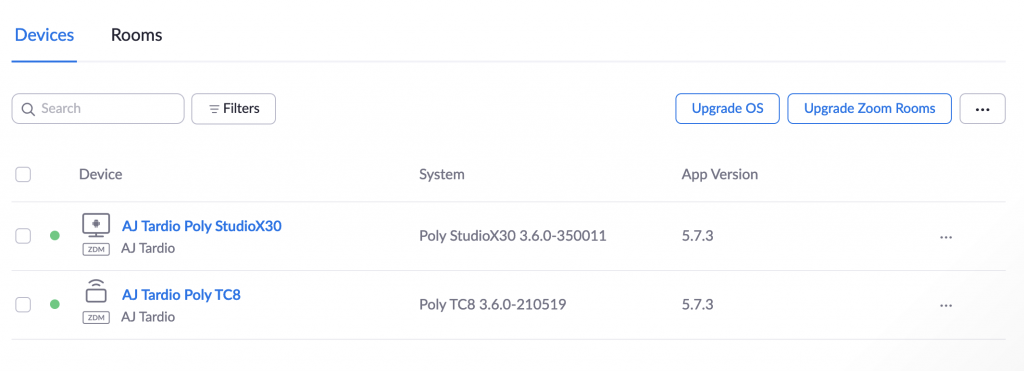
Once you see the Poly Studio x30 and TC8 added to your Zoom Room you should be good to go!

Experience with Zoom Personal Room

Now that you have your device setup, be sure to integrate your calendar and contacts with a service like Microsoft 365 in order to have our meetings displayed on your Zoom Personal Room. This will give you that one button to join experience, you will never be late to a meeting again!
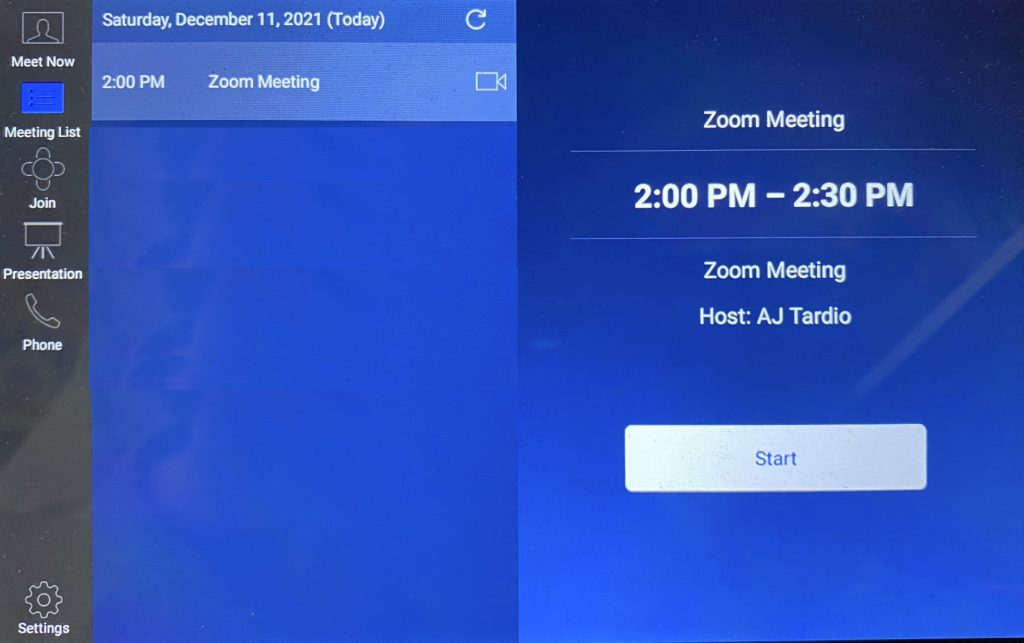
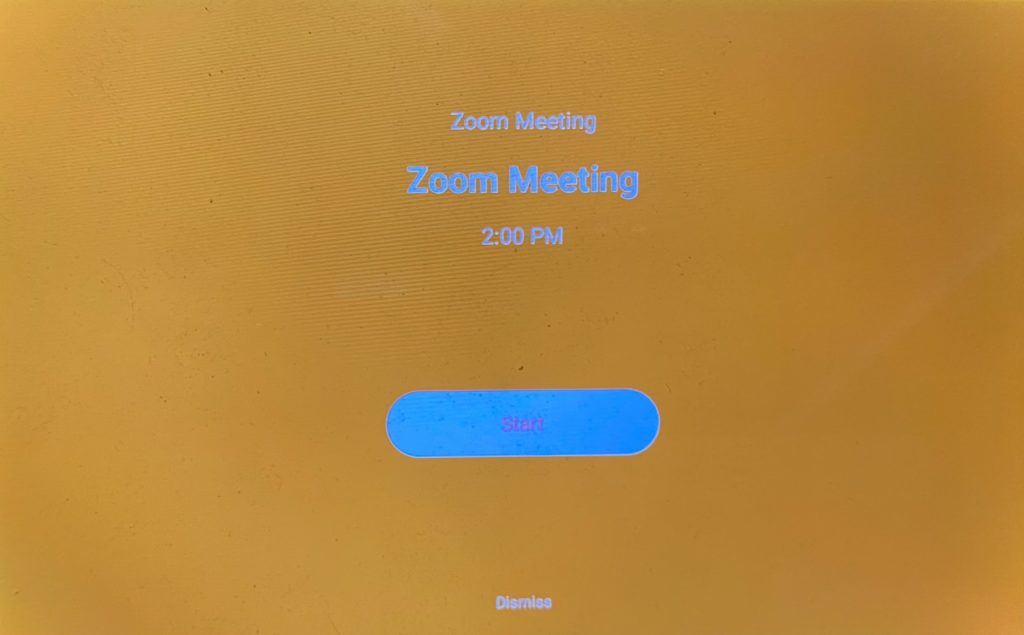
Zoom Personal Room
Zoom Personal Room

Conclusion

The Personal Zoom Room with the Poly Studio x30 is a great way to have a very personalized meeting experience with Zoom. The high quality hardware will be a great experience, and when you connect it with your calendar and contacts it will become even more personal. If you are considering upgrading your home office or looking for a solution for a small meeting room you won’t be disappointed. Be sure to check out more Collaboration blog posts here.
Azure AD MyApps Collections | Organize your applications

Introduction

Microsoft released a new feature for Azure AD MyApps called Collections. It’s been in public preview for a little while but has released as general availability for the February identity updates. As they indicate in this article, “With the general availability of user-based collections in Azure AD My Apps, users can now create and manage their own personalized app collections while freeing IT resources and time for other tasks.”

Challenges

If you are on the journey of a password-less solution like the Microsoft MyApps portal to organize your enterprise applications into a Single Sign-On solution it’s common to have “app overload.” Our organization has 100+ apps now configured, with so many our users continue to ask about a way to hide or organize them. Microsoft doesn’t offer a way for users to do this, there is a way for Administrators to publish Collections to users but it is limited in its features. With the new user based collections anyone can do it themselves. Let’s take a look!

Organize your applications

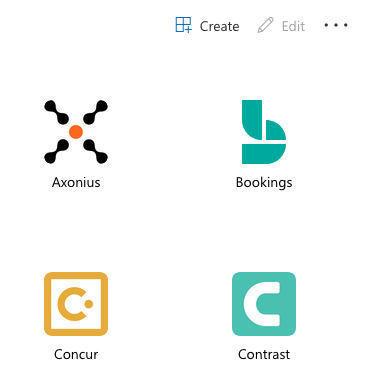
  1. Click on the Create button to give your Collection a name.
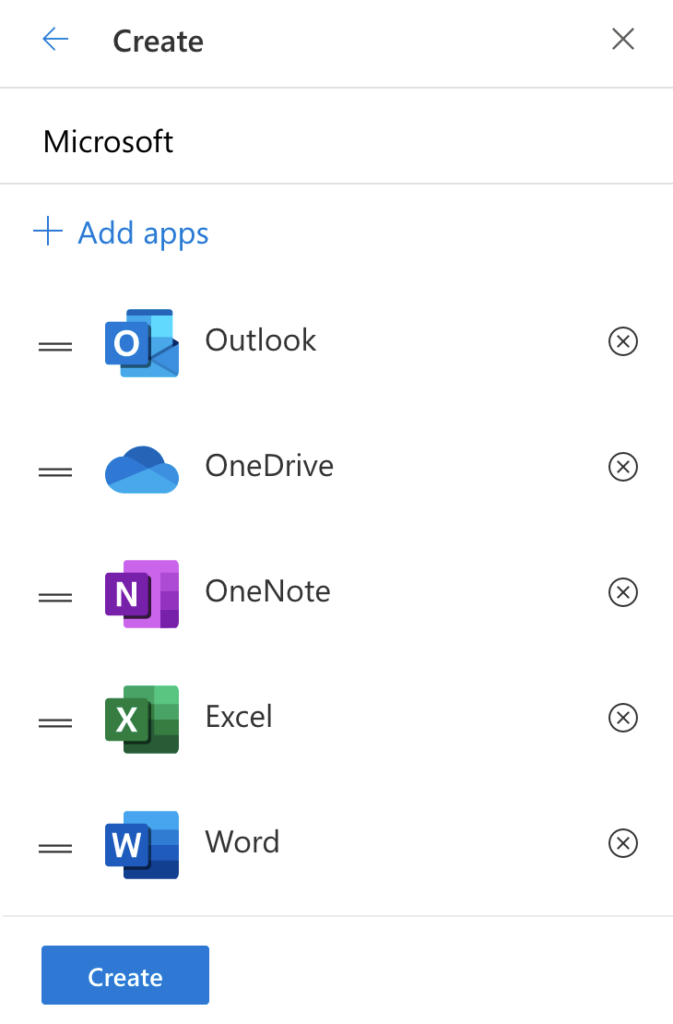
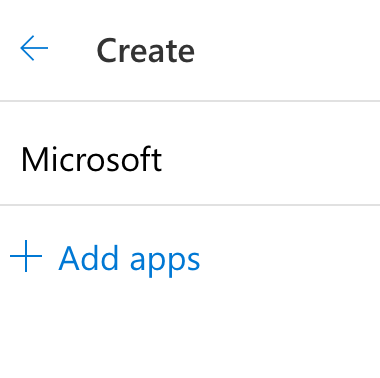
  2. Let’s add some of our Microsoft applications, you can drag and drop them in order, then click Create.
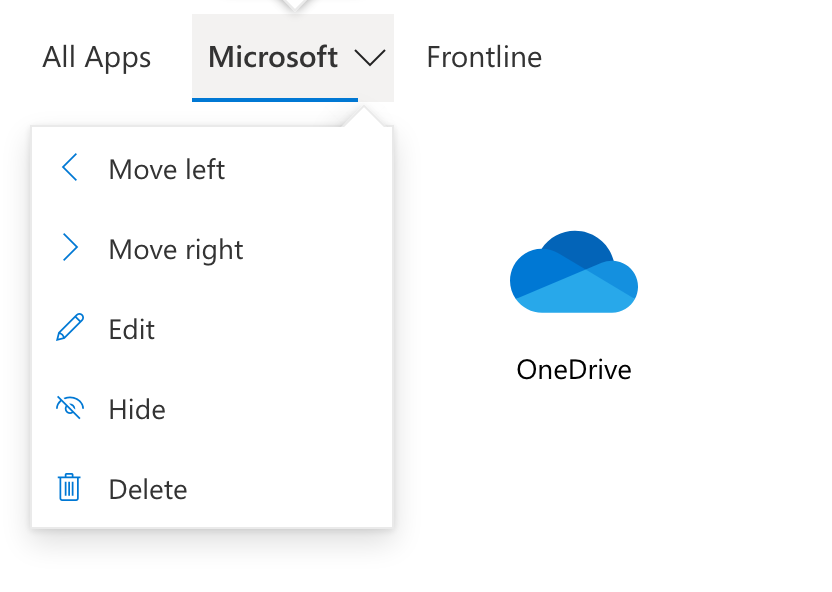
  3. Now you will see your new Collection. You can click the down arrow next to the Collection to make changes.
  4. Enjoy your new Collection!
Azure AD MyApps Collections

Conclusion

This new Azure AD MyApps Collections experience is a much needed update for Microsoft. Organizing applications into different collections is a feature many other Identity solutions provide. If you haven’t started a password-less journey yet with a solutions like Single Sign-on you are missing out! Your users will rejoice with even a few applications that they don’t need to remember a username or password for. Take a look at a few other articles I have posted on MyApps and Single Sign-on.

Transition to working from home | 2020 Year In Review

transition to working from home

Well that’s it, another year has passed us by and we move into 2021. I think everyone would agree it’s been a year unlike any other because of the COVID-19 pandemic, but how has your transition to working from home gone? For me, I’ve worked from home before so I was a little more prepared than the average person. Our company has a flexible work location policy and I’ve worked from home to help balance out the after hours work I do when migrating and maintaining systems. We have two kids and it’s been great to be around our home to help a little more.

Time Balance

It can be difficult to focus on your work when you have kids in the same room. Ask anyone who has brought their kids to work for an event, very little actual work gets done! I’ve been doing ok this year with this, I’m able to put earbuds in or move to another part of the house that isn’t as loud. The greater challenge I have though is just balancing all the “stuff” around the house. I’m naturally a maintainer, not really O.C.D. but I’d much rather pickup toys off the floor every hour rather than shovel them at the end of the day. The greatest challenge I’ve had working from home is to try and ignore what’s going on around my house after I return from a bathroom break.

What I Missed Most

The thing I’ve missed most this past year is a little time in the car commuting (45 minutes each way). I’ve typically listened to the news or podcasts during my commute and I just can’t seem to replicate that at home. With two young kids I’ve pitched in keeping them busy, making meals, transitioning tasks, so I haven’t been able to recreate a time for myself. I really miss that. Sorry podcasts companies, you’ve lost an active listener over the past year!

Workstation Setup

One big challenge I think most people have, is where to work? I don’t have a home office, I’ve typically setup in different spots around the house when working from home and didn’t have a dedicated space. The first few months I spent a lot of time standing at our dining room buffet using an Amazon box and laptop stand (I know, quite techie for an IT professional). Although it’s rather basic, it keeps my screen at eye view and my bluetooth keyboard and mouse are at the right height when standing. Most days I will spend about half the day like this.

After a few months though I mounted a monitor to the wall in my basement and use that space when I need to use a second screen. This space has proved very valuable when I get on meetings and could use a little more quiet time. Here is a couple items that have helped me:

  • Jabra Evolve 65e – these earbuds have good range moving around the house, loved quality and battery life, stay in good when picking up kids or working out, but the mute button is key! Not many models offer this, I love being able to mute/unmute without standing at my computer.
  • LED Ring Light – like most basements ours doesn’t get much light, this has been needed to have higher quality video.
  • Background – I’m a big soccer fan, I’ve collected scarves from teams all over the world. I had an idea to create a backdrop with these, it’s been a great conversation starter! (see picture above)

Conclusion

Overall I learned how to transition to working from home and be just about as productive as in an office. I think it’s very hard to calculate productivity, at times being in the office is not productive as you run into people unexpectedly. It’s much easier for me to shrug off one of my children who I will see at lunch, or dinner, or bed time, or…you get the point. I miss the face-to-face interaction with co-workers, but having a great video meeting solution keeps us connected. Well that’s my 2020 Year In Review, check out the General section to keep reading on where I’ve been since starting this website.

Azure AD MyApps Portal

Introduction

Have you made the move to consolidating user access to a single sign-on (SSO) portal yet? If Active Directory is your primary source for user access, the Azure AD MyApps portal is a great place to start consolidating your access. For the sake of time I’m going to jump right into some ways to customize this portal, if you need more information on moving to SSO, take a quick read here.

Azure AD MyApps Portal

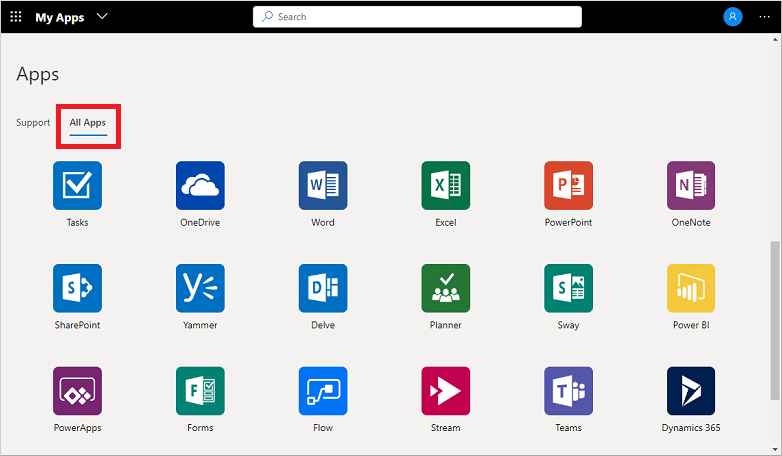
The new portal released general availability in 2020-Q1, it has a nice new feel and the Microsoft AzureAD Identity team has boasted a lot more features to come. To start, update to the new MyApps experience and try to create collections of apps. This could be a great way to group them together based on a security group for Client Success, Development, Sales, etc. I sure hope more features keep coming for it like Compact View, Pinned Apps, or a Frequently Used tab. You can go to their UserVoice page to submit new ideas or vote on current ones.

Clean up the portal

One big issue I’ve seen with Azure AD MyApps Portal is that it will start adding icons for apps you don’t want to see. For example, if you deploy an Outlook Add-In or oAuth for an app service it will now show for your users in their portal. When you click on it there will be an error or take you to a unexpected location. Well let’s clean that up! Here’s a few steps to do it:

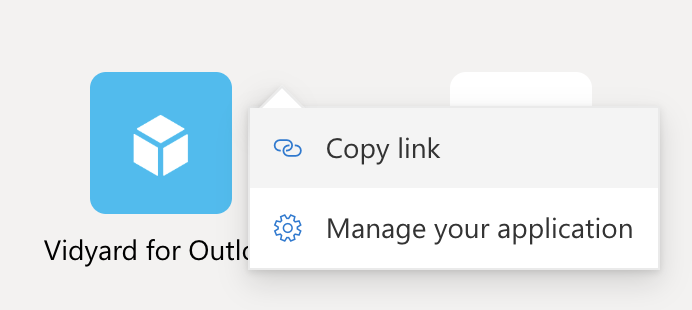
  1. We’re going to take a look at this VidYard app – click the 3 stacked dots and then Copy link
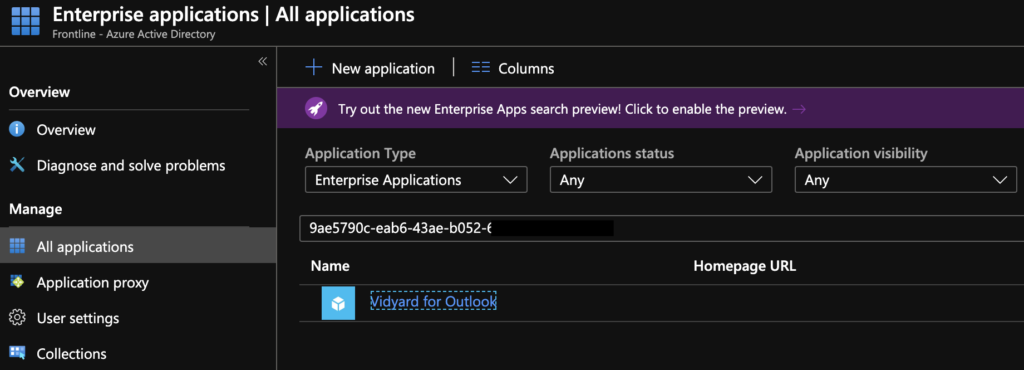
  2. Now paste that link somewhere to inspect it. You will see a long string, you want the Enterprise App ID found after the name and before the Tenant ID. Use that ID to search for the app in Enterprise Apps in Azure AD.
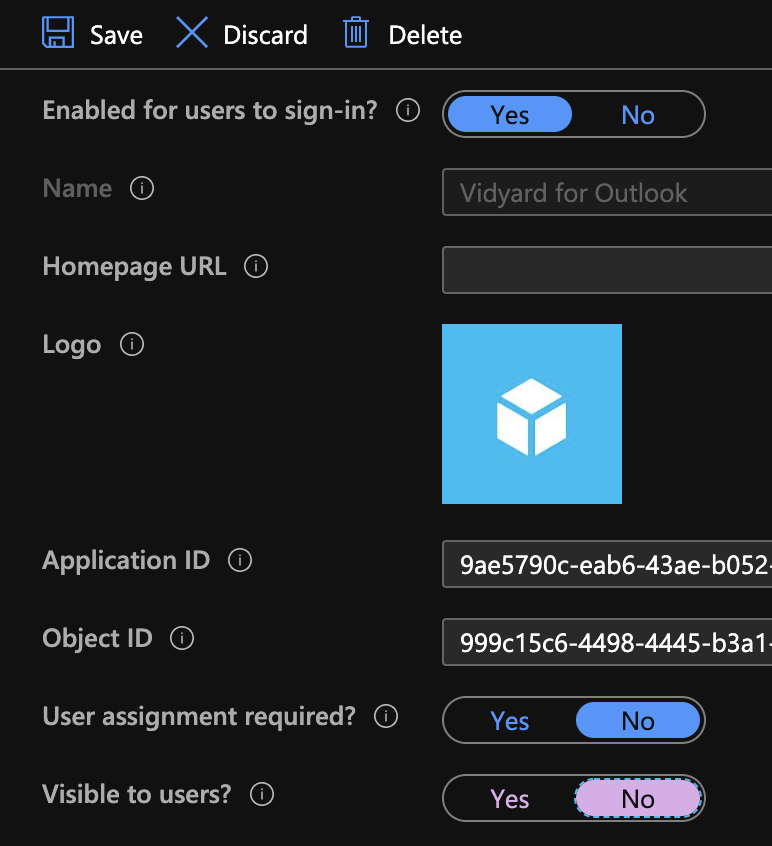
  3. Now go to Properties and switch the Visible to users to No
  4. That’s it! Users can still authenticate to this app but won’t clutter up their MyApps portal. (I’ve seen it take about 10 minutes to be hidden)

Powershell process

So now that we went over the easy way to do it, let’s take a deeper dive into a way to do this in a bulk method. Also, if the app doesn’t show in your portal doesn’t mean it’s not showing for others. You can use the method for all apps in Azure AD. One disclaimer, some apps can not be hidden (specifically Microsoft apps). Microsoft has documentation on hiding applications here.
  1. First connect to Azure AD > then get all Service Principal Names
  2. Or if you want to search for a specific one use -SearchString zoom
  3. What you need is the ObjectID (you can also get this from the UI version of the portal for any Enterprise Application)
  4. Now use the last few lines to actually hide the app – a great example are the “App for Outlook” add-ins you can deploy to all users. There is no reason to have this show in the MyApps portal – clean that up for your users after you deploy it!
Connect-AzureAD
Get-AzureADServicePrincipal | Sort DisplayName 

ObjectId                             AppId                                DisplayName                       
--------                             -----                                -----------                       
01c9b439-a0c4-4e5b-a4c9-XXX123XXX456 f0ae4899-d877-4d3c-ae25-XXX123XXX456 AAD App Management                
0bd5a26c-8889-44b6-870a-XXX123XXX456 4e9b8b9a-1001-4017-8dd1-XXX123XXX456 Adobe Acrobat                     
20446487-87cf-4ddf-bed9-XXX123XXX456 00000013-0000-0000-c000-XXX123XXX456 Azure Classic Portal

Get-AzureADServicePrincipal -SearchString zoom

ObjectId                             AppId                                DisplayName     
--------                             -----                                -----------     
e3d65048-e393-48ff-9ac9-XXX123XXX456 fc108d3f-543d-4374-bbff-XXX123XXX456 Zoom            
1e5366dd-39d4-44ea-XXX123XXX456 d835d24c-a73d-44fe-af63-XXX123XXX456 Zoom            
eb61dc02-64e1-4b8a-XXX123XXX456 15151540-1838-48ac-bb91-XXX123XXX456 Zoom for Outlook 

$objectId = "eb61dc02-64e1-4b8a-XXX123XXX456"
$servicePrincipal = Get-AzureADServicePrincipal -ObjectId $objectId
$tags = $servicePrincipal.tags
$tags.Add("HideApp")
Set-AzureADServicePrincipal -ObjectId $objectId -Tags $tags

Conclusion

Keep your Azure AD MyApps portal cleaned up for your users before they go crazy with so many icons. It would be great if Microsoft would start adding new features to keep down on the clutter, but until then you can do your part. If you’re moving your users to the MyApps portal for all your SaaS apps, this is a must keep their sanity. Check out more features of Office 365 and Azure Active Directory with these links.

Schedule a Task to Cleanup a Log Folder

Introduction

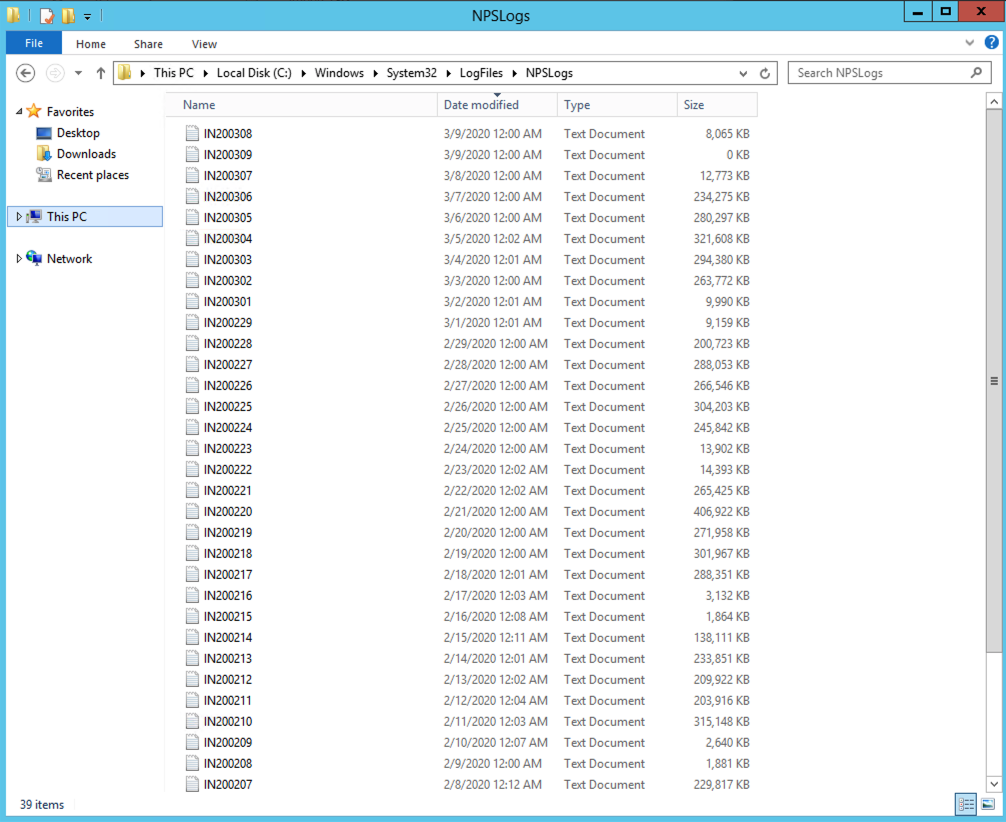
Have you been alerted about a drive filling up over the weekend during your monthly patching schedule? What a bad moment to get a warning like this and have to deal with before the server locks up by Monday morning. Expanding a drive can be your first reaction, but after it fills up again a few months later you dive into it by analyzing disk space only to find it’s a pesky Log folder filling up for years now. Say no more, let’s schedule a task to cleanup a log folder!

How To Schedule a Task

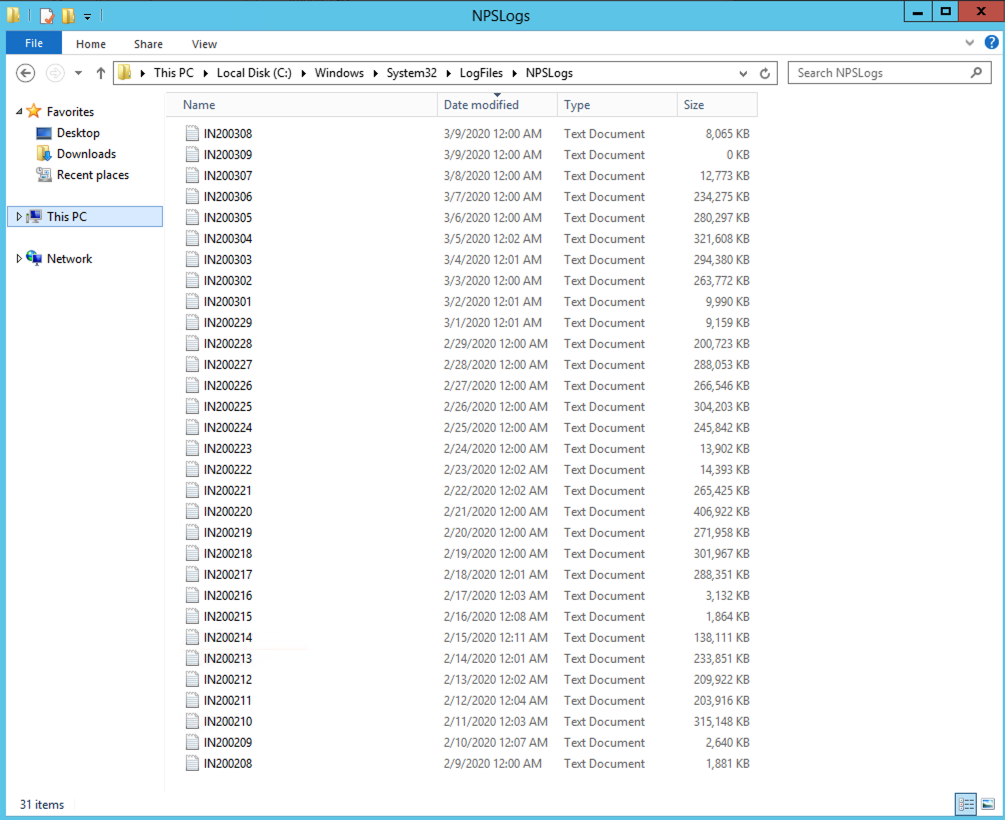
Here is some light reading on using forfiles – a way to select and execute a command on a file or set of files. We are going to use it to clean up a folder on a Network Policy Server.

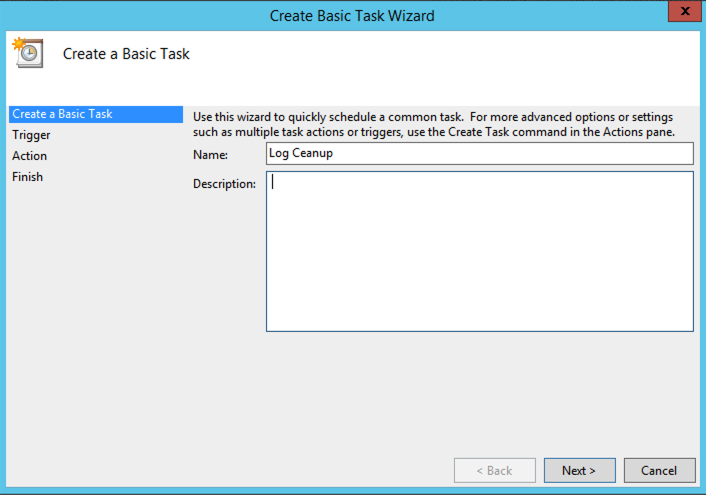
  1. Open Task Scheduler – Create a basic task
  2. Give it a Name and Description
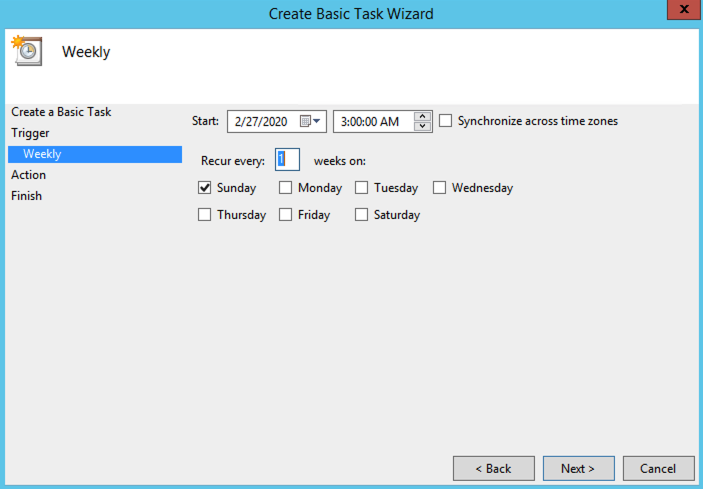
  3. Trigger – how ever often you would like to clean it up
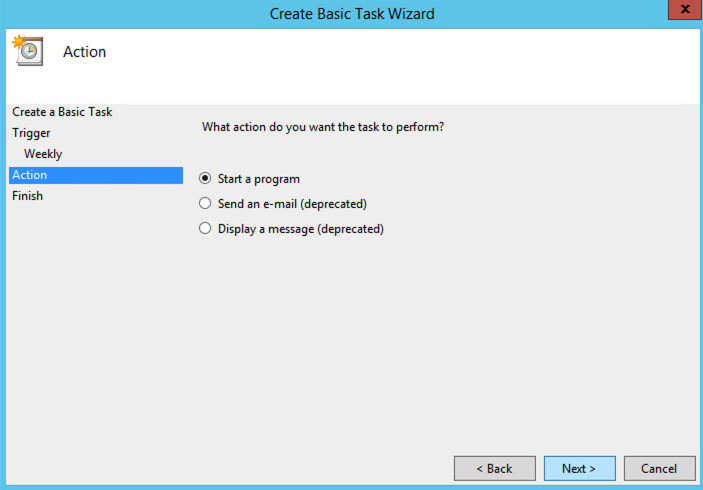
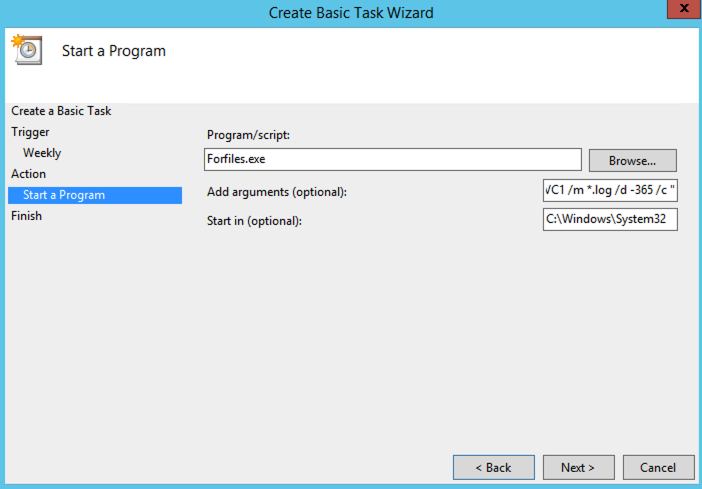
  4. Action – Start a program. These are the specific details I have used:
    Program/script: Forfiles.exe
    Add arguments: /p C:\Windows\System32\LogFiles\NPSLogs /m *.log /d -30 /c “Cmd.exe /c del @file”
    Start in: C:\Windows\System32
  5. Once complete Run Now to see if it works – backup the folder first!

Tips

Here are a few more thoughts to keep in mind:

  • If you are concerned about the data be sure to copy the entire log folder somewhere else while you test out this process.
  • Run the task as a local Admin account or a service account where the password won’t change. Otherwise the script will stop running after you change your password.
  • You can delete more than just log files, look above in the argument for the *.log parameter for file type. You can change this up to a different file type if your software uses a different kind.

Conclusion

Hope this helps you schedule a task to cleanup a log folder. I’ve found it’s better to be proactive about this, before you know it years have passed since you setup the server and you wished you would have taken the 15 minutes to have a scheduled task. See more posts about IT Operations here.

Stop users from auto-forwarding email to external users

exchange online admin center

Introduction

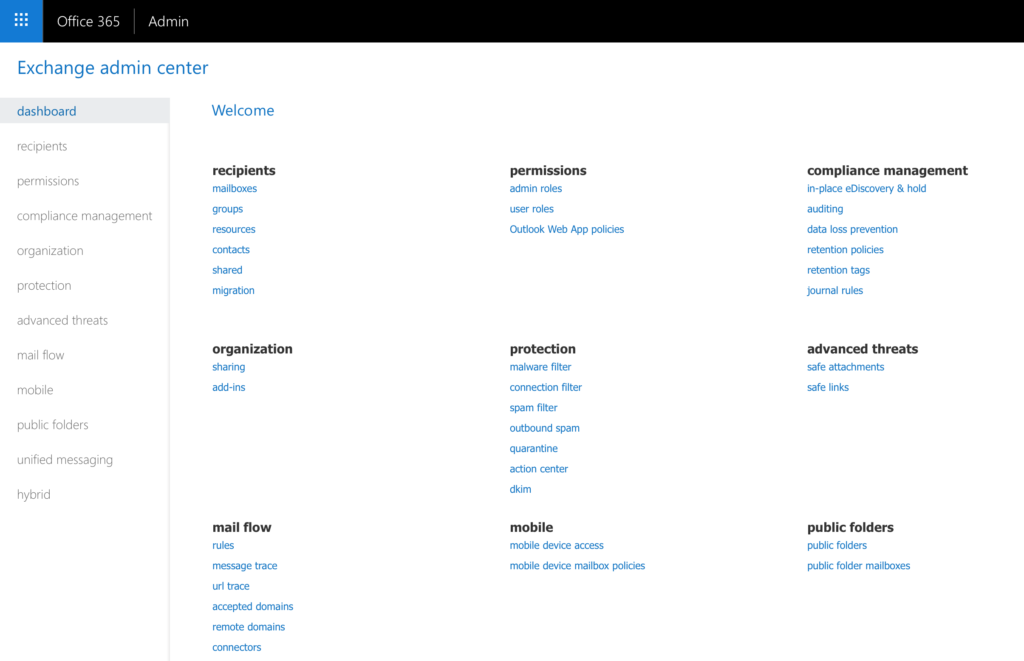
Have you run a report to see if users have setup Outlook rules to auto-forward email to an external email like their personal email? I was blown away after running a report to find multiple users who had a generic rule to forward their email to their personal email. If you’re concerned about data loss this is a big issue, let’s take a look at how to stop users from auto-forwarding email to external users.

Find out who is auto-forwarding

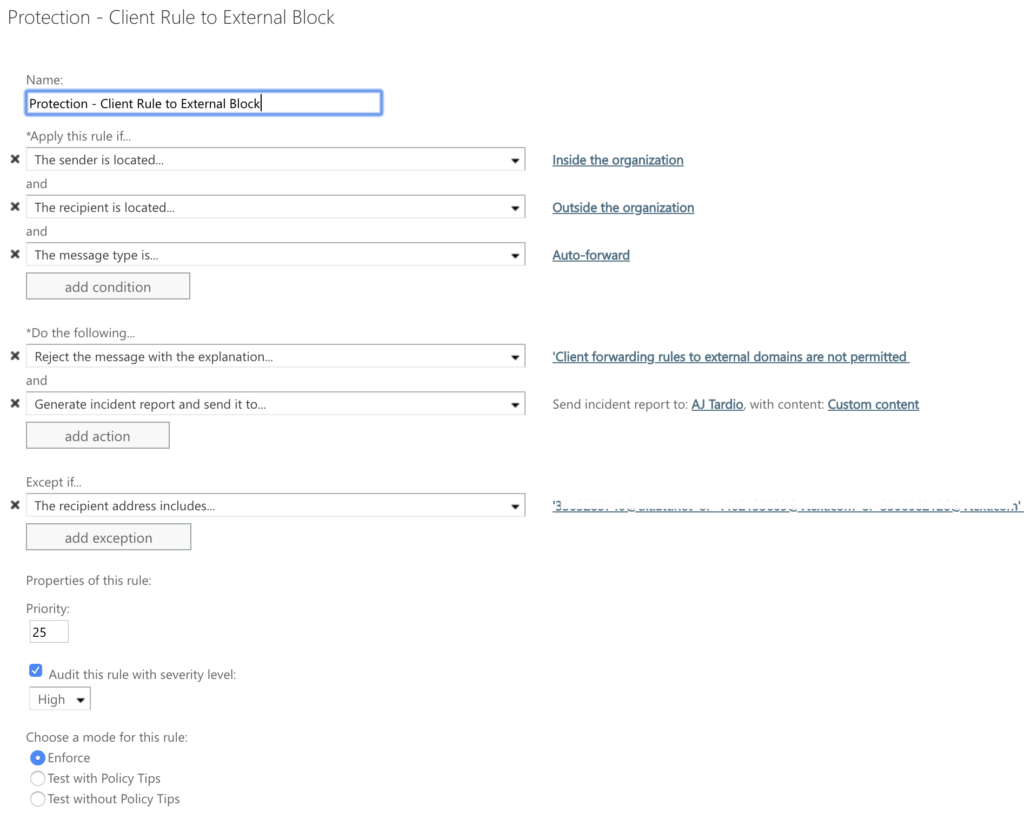
Take a look below at a way to setup a Mail Flow rule in the Exchange Admin Center to start blocking message type of auto-forward. You will want to use the following for:

Apply this rule if:

  • The sender is located: Inside the organization
  • The recipient is located: Outside the organization
  • The message type is: Auto-forward

Do the following:

  • Reject the message with the explanation: <Use your own custom explanation for users to see.
  • Generate incident report and send it to: <email address>

Except if:

  • The recipient address includes: <add any exceptions here to still allow>

Finally choose to “Test with (or without) Policy Tips” – what this will do is start testing the rule. You will want to be sure you have added an option to send incident reports so that you can find out who is abusing this auto-forwarding rule. When you’re ready, you will change the mode to Enforce as detailed in the screenshot above.

Removing the option to Forward

There is a place in the Outlook settings that you can remove for auto-forwarding email. If you are using this for service or shared mailboxes you will want to make any forwarding changes in the Exchange admin center, not at the user level. Microsoft has documented this process, you can follow these steps in Turning off forwarding in Exchange Online. Those steps are for making a change at the user level, I would recommend making a change at the tenant level so all current and future users will have this option removed.
First you will need to run 2 commands in PowerShell:

New-ManagementRole -Parent MyBaseOptions -Name MyBaseOptionsNewDefault

Set-ManagementRoleEntry MyBaseOptionsFrontlineDefault\Set-Mailbox -
Parameters DeliverToMailboxAndForward,ForwardingAddress,ForwardingSmtpAddress -RemoveParameter

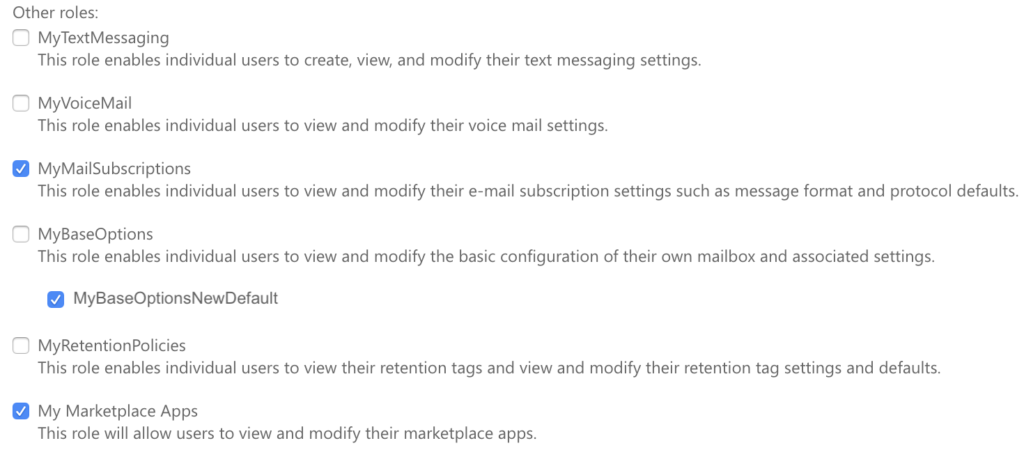
Once this is complete you will see a new option in your Exchange Admin Center > Permissions > User roles > Default Role Assignment Policy (you may have more policies). Now open up that policy and check the box next to the “MyBaseOptionsNewDefault” that you created in PowerShell.

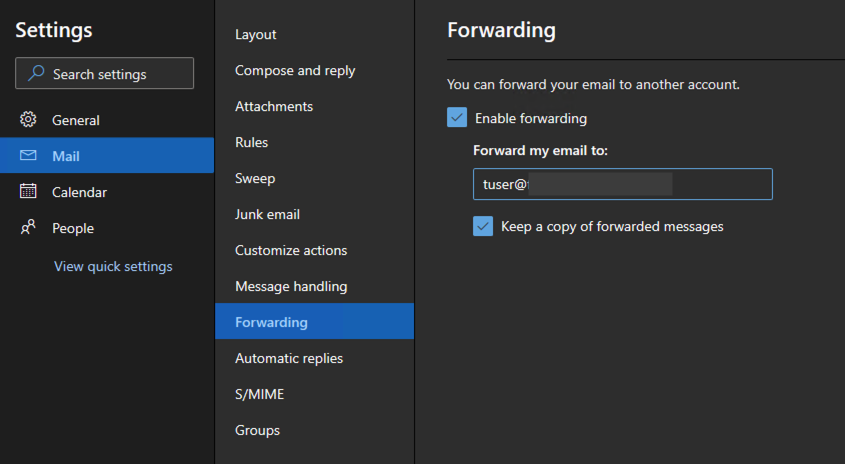
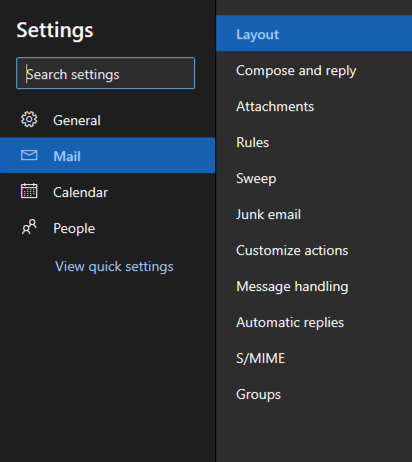
Here is a before and after of what it will now look like in the Outlook web app under Settings > Mail > Forwarding (option is completely removed):

Conclusion

I hope this gives you guidance on how to stop users from auto-forwarding email to external users. The first step was to put up a wall with a Mail Flow rule so they can’t setup any forwarding rules. The second step was to remove the option in the Outlook user interface for forwarding all email. Users can still forward emails one at a time, but now there shouldn’t be any way they are doing it with auto-forwarding. If you liked this, be sure to see other tips in the Office 365 category.

Apple CarPlay | Installation and First Impressions

Apple CarPlay update for iOS 13

Introduction

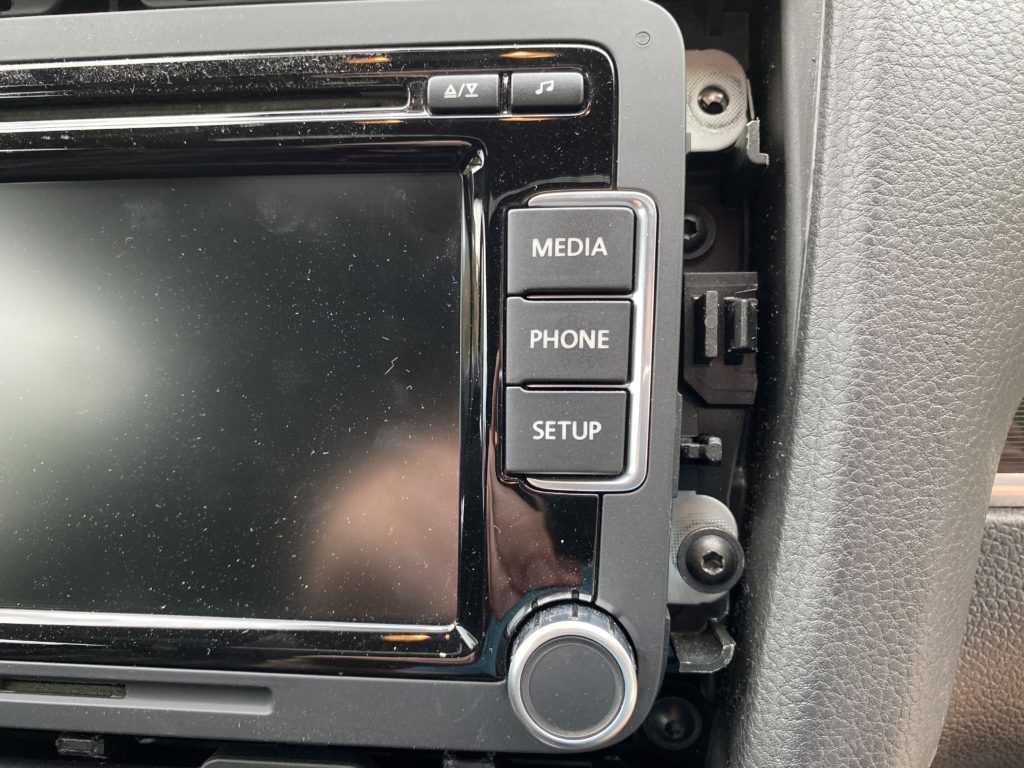
I drive a 2012 Volkswagen GTI, it’s the second GTI I’ve owned. I upgraded from a 2007 because of a great 0% financing plan available at the time when I traded my 2007 in. That reason aside, I upgraded because the 2007 didn’t have any bluetooth features. It’s a little comical to me know as I write this, but yes cars didn’t have bluetooth in the early 21st century. Now in 2019 Apple CarPlay and Android Auto are becoming the standard. I drive about 300 miles a week, my commute each way is about an hour. I’ve been wanting Apple CarPlay for years now, here are my first impressions on the install and upgrade.

Upgrade to Apple CarPlay

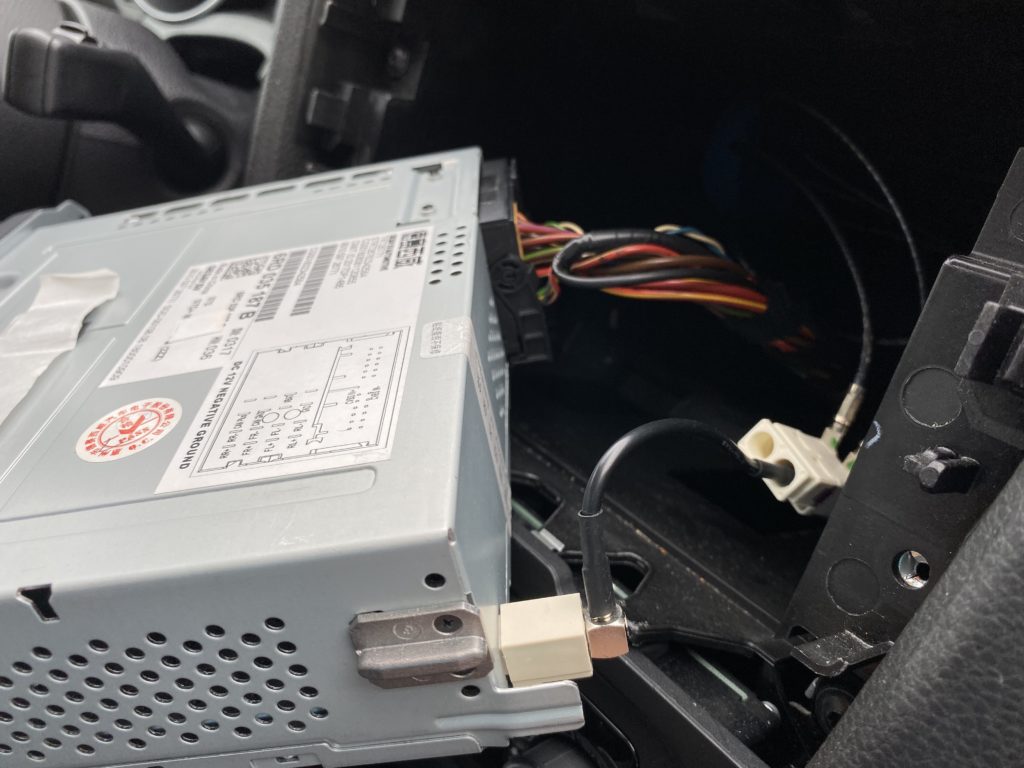
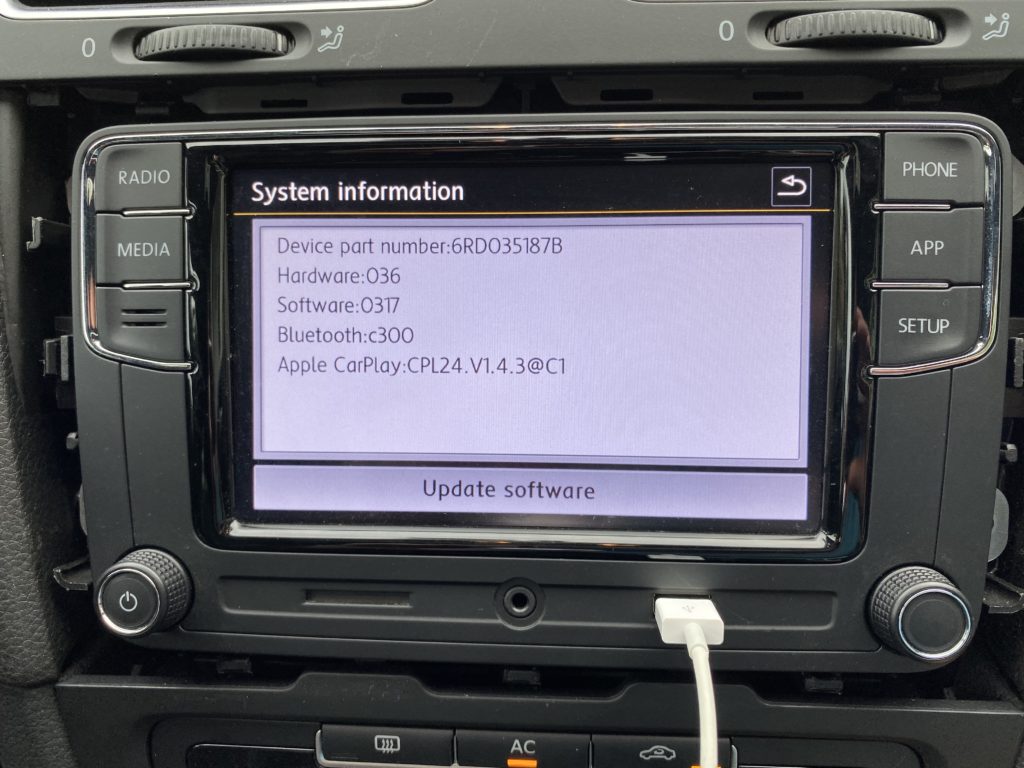
I didn’t really consider many of the aftermarket options for CarPlay, I didn’t want something that looked like it didn’t belong to the Volkswagen brand. I was doing some searching and found a seller on eBay that was selling the original equipment manufacturer from Volkswagen. Many of these on eBay are from foreign sellers, but the one I found was located in the United States. For $250, seemed like a steal to me to get an upgrade like this. I checked a few popular Volkswagen forums to find many others sharing a good experience. The model I purchased was the RCD330 CarPlay version 6RD035187B. It came with the radio antenna adapter and CVBS reverse camera adapter. I don’t a reverse camera, so I didn’t use that.

Installation

The install was easy, just about anyone could do taking their time. It took me less than 10 minutes. Here were the steps:

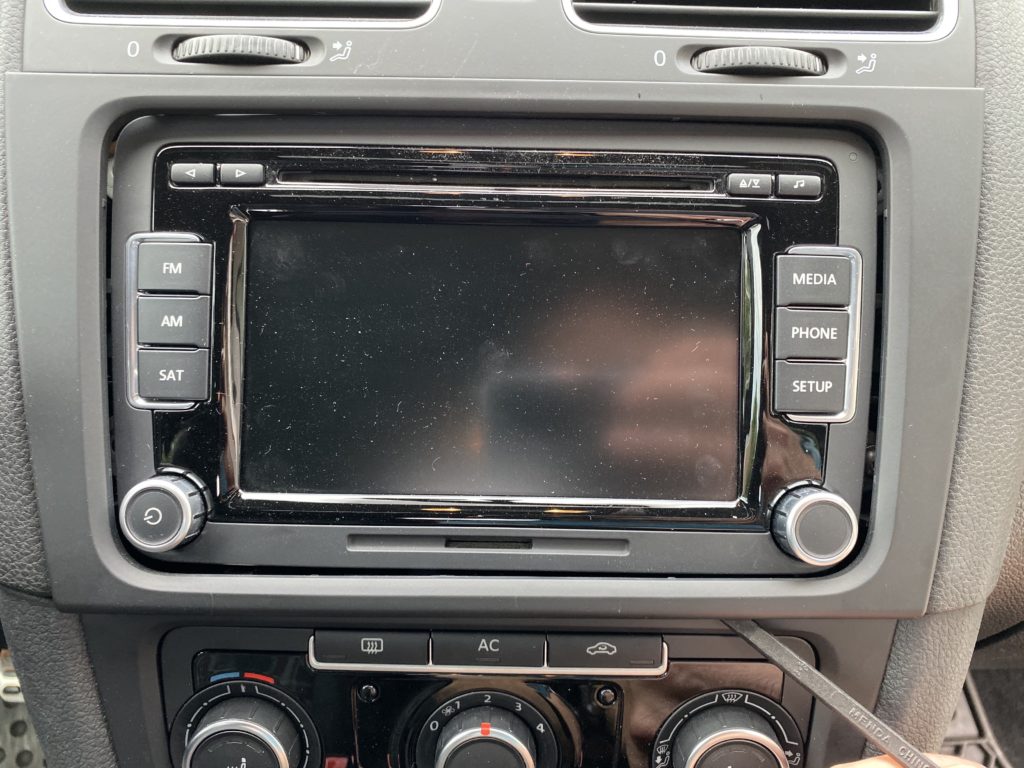
  1. Use a thin piece of plastic like an old credit card to slide under the frame. I used a spudger that is used to take apart computer casings. Just start at a corner and start working your way around, apply a little pressure up to pop the points away.
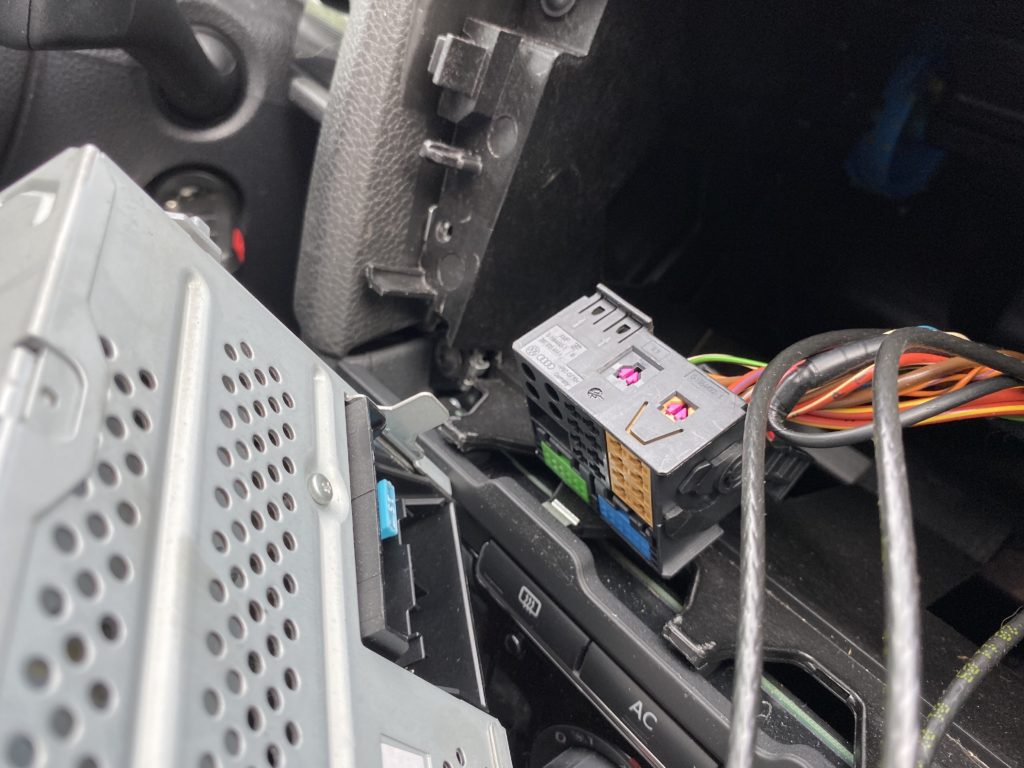
  2. Once the frame is removed you will find 4 Torx 20 screws to remove – 2 on each side. After those are out, you can slide the the head unit out.
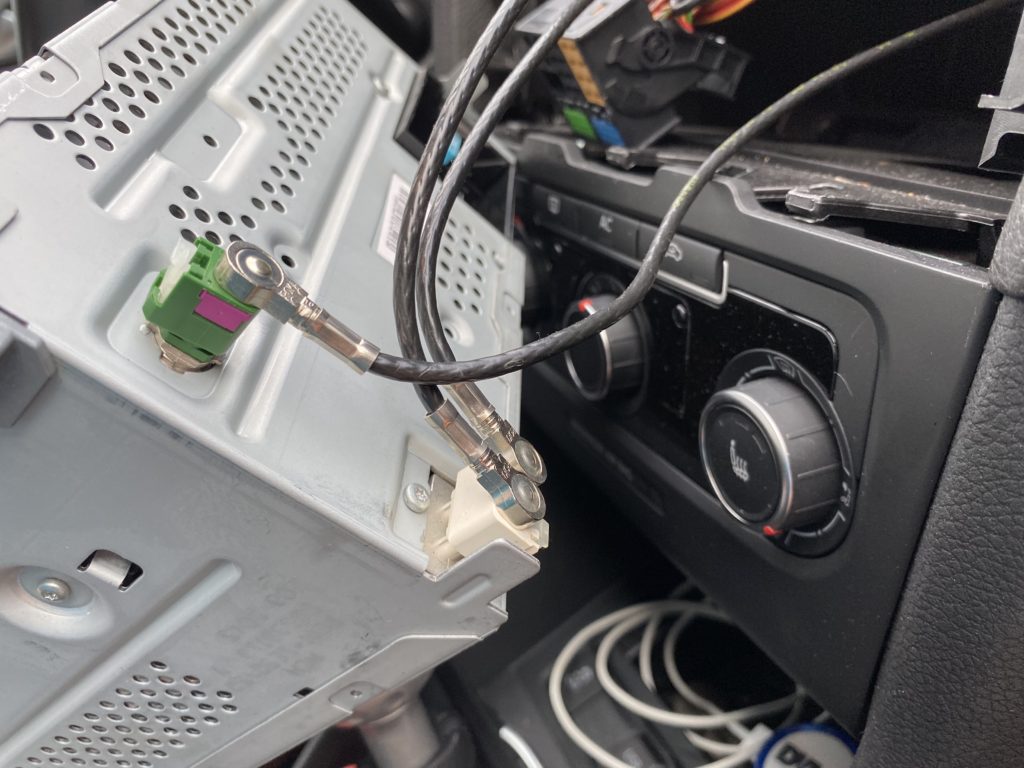
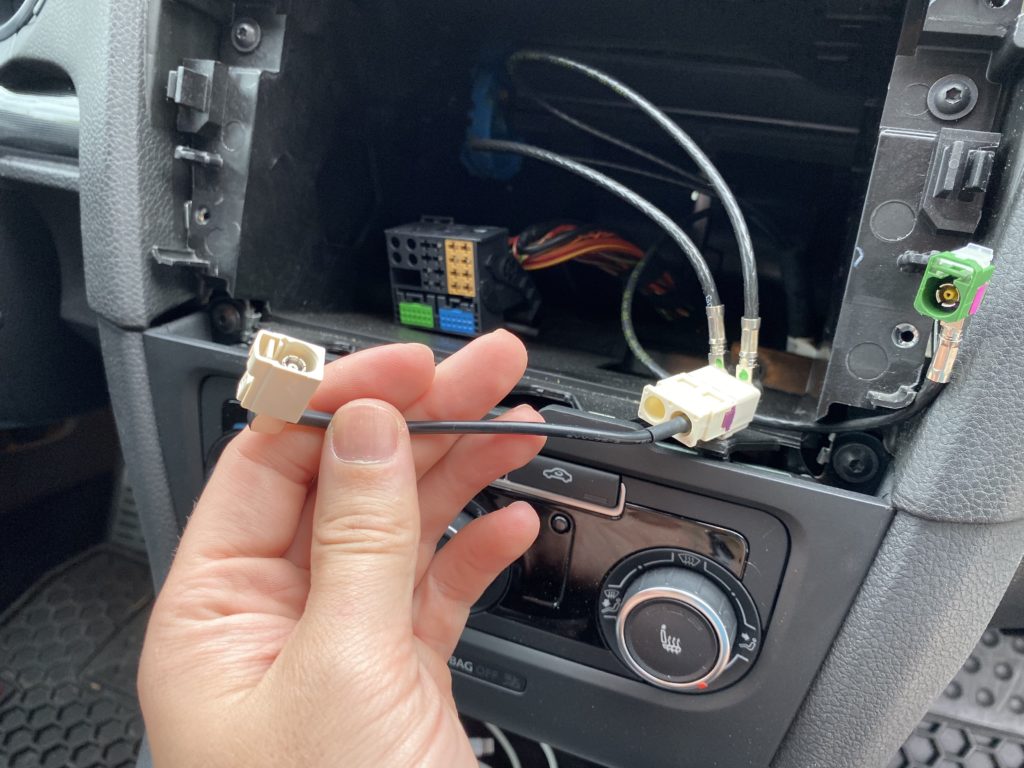
  3. Now just unplug the current model, and plug in the new model. You will need the radio adapter to convert the 2 cream colored cables to a single cable. The black rectangle of cables plugged right in. The green cable was not needed.
  4. Slide it back in, turn the car on to see if everything works. If so, put the screws and frame back in and you’re ready to go!

First Impressions

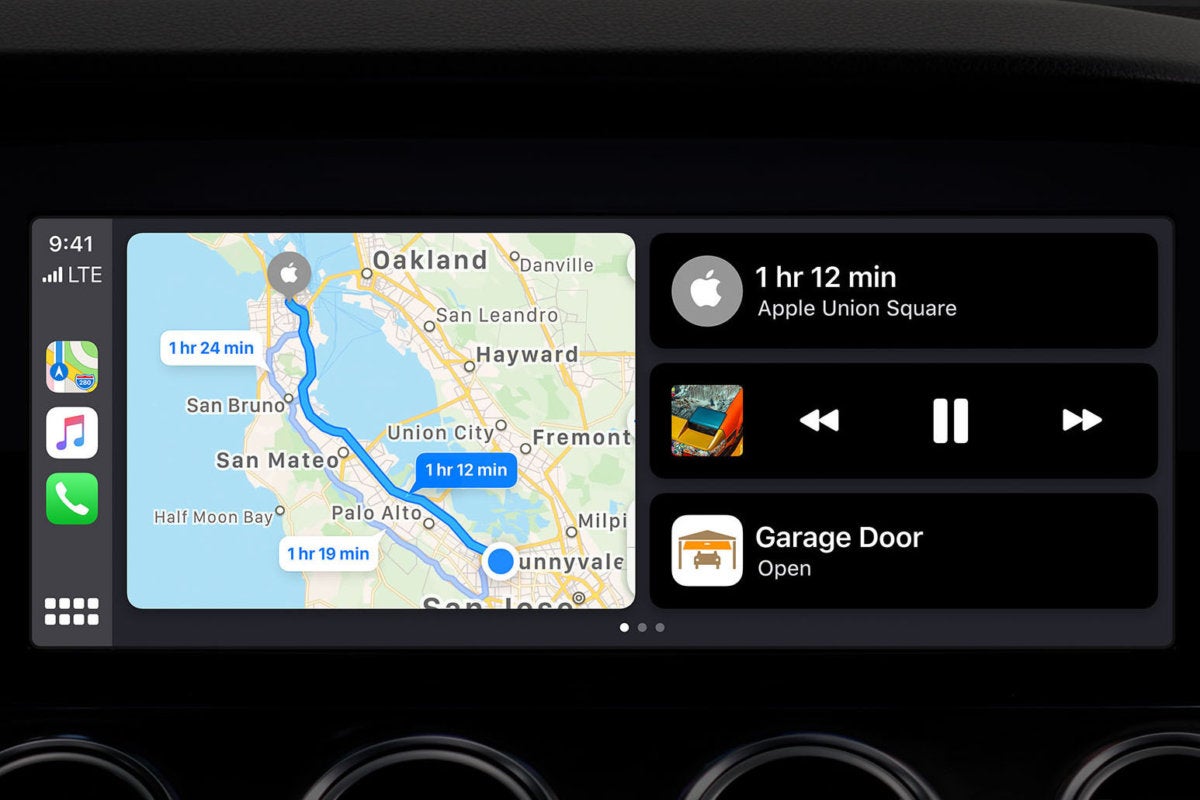
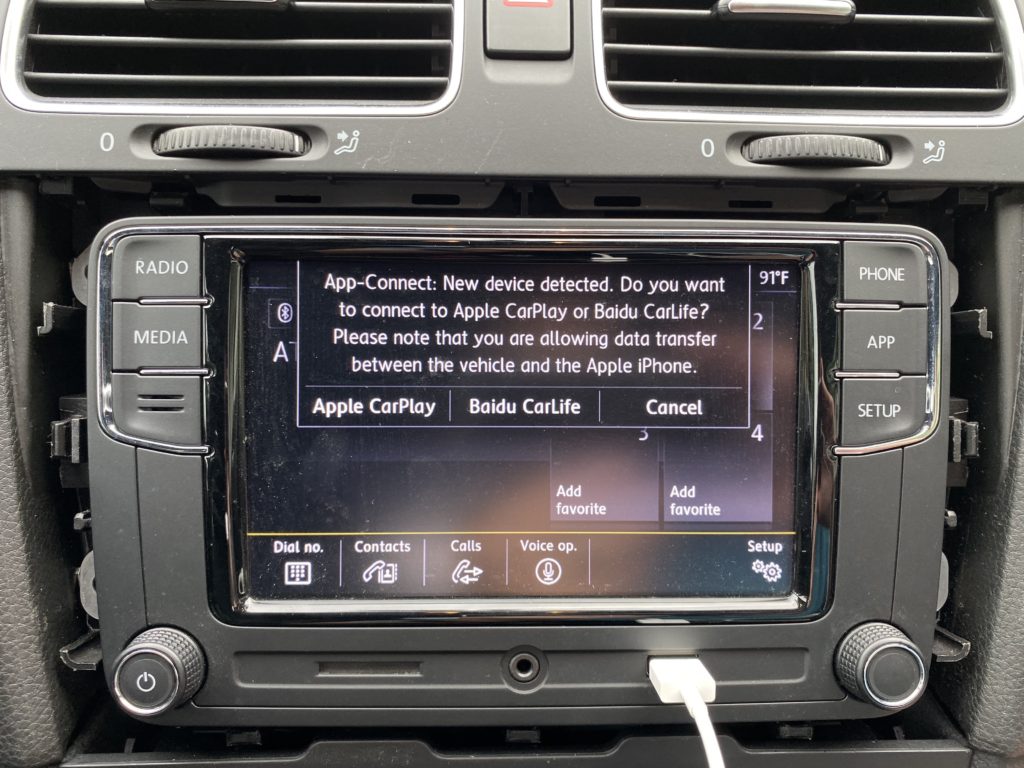
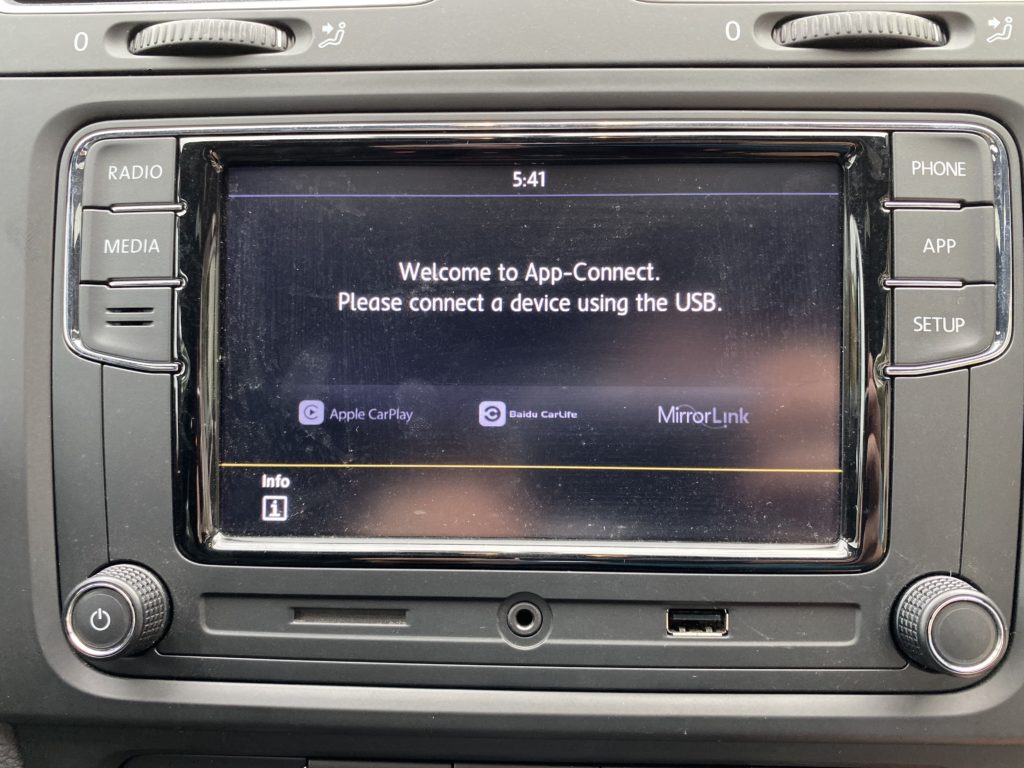
Wow, what an upgrade! It’s hard to explain the simplicity of this, but your phone is now on a screen completely adapted to your driving experience. Since the software runs from your phone, the experience is just like the iOS version you have installed. Quick access to many of the apps you use every day like your Phone, Maps, Music, along with many others like Pandora, Waze, etc. Plugging in your phone will charge it while you drive, it’s a downside to have to plug it in but nice to have for charging on long drives. There are future versions of head units that now support wireless CarPlay! But for now, here are the basics of Apple CarPlay if you haven’t seen it before. Be sure to consider it for an upgrade or future car purchase!

Pictures of the install

Protect email from foreign countries with Exchange Online

exchange online admin center
Exchange Online Admin Center

Introduction

A common way to stop security threats for your users would be to protect email from foreign countries. If you do business internationally keep in mind you will want to be sure those countries are not blocked. I’ve blocked most international country codes in Exchange Online since our company only works domestically. Recently we’ve started working with off shore teams though so I needed to take a closer look at how this all works.

Protect email from foreign countries

Go to the Exchange Admin Center > Protection > spam filter. Under international spam you will see languages and countries. If you click the + sign you will find a whole list you can select (hold down Shift or Control button to select a range to add). Click Save and away you go, you are now have a way to protect email from foreign countries or languages.

Troubleshooting

If you haven’t inspected an email header before, now is a good time to do some reading. Here is a good article from Microsoft on just about everything for anti-spam message headers. Microsoft also has a Message Header Analyzer to help you break down everything in a more readable format.

Solution

Since we started working with users internationally with their own email servers we needed to come up with a way to be sure their emails weren’t going to be marked as spam. I didn’t want to just remove the entire country they worked in since it was known as a large source of spam. Also they’re email system could change and start to come from another country next door. So I tested if we added the domain to our Allow List if it would overrule any kind of country setting we had. It did! If you add a domain to your spam allow list it will deliver even though you are blocking that international country code. See my article Tips with Office 365 Email Safe Senders if you haven’t worked with that setting before.

Conclusion

This is a very quick way to help protect email from foreign countries. It’s an easy hole to plug pretty quickly, you can always be more aggressive at first then start to pull back as your user’s report the need to communicate internationally. The emails will land in your Quarantine, they won’t be blocked completely.

Email Migrations to Office 365 | Lessons Learned

I’m back! I’ve been away for the past few months focused on email migrations for a few companies that we’ve recently acquired. I wanted to post a few lessons learned from what I’ve recently learned on email migrations. I’ve done close to 20 acquisitions in my career, still not an expert but some may say I’m smarter than the average bear.

MigrationWiz by BitTitan

Using a migration tool is highly suggested! It’s going to cost some money but this software is worth it. In most cases if you want to migrate both email and documents it’s going to cost you around $15 per user. It’s not going to be free, but it won’t break the bank either. I’ve used MigraitonWiz for years now, there’s still my go to because of the simplicity and price.

Export Everything

I’ve worked with technical staff in most acquisitions, but very few have good backups and understanding on how everything works. Do as much exporting of properties you can to keep around for when something doesn’t work after the migration. I’ve gone to these almost every time to find an email address or forwarding rule that couldn’t remember how it worked.

DNS Updates

Be prepared and start updating DNS before the migration. I’ve been surprised to find MX records with 1 day TTLs. This doesn’t always represent how long it will take to update DNS when you are ready to cutover from one email system to another, but the shorter you can reduce these the less time you will be waiting around on migration night.

Office 365

I’ve been managing Office 365 and Exchange Online since 2015, there’s still plenty to learn for migrating. If you are doing a tenant to tenant migration, get your scripts ready! You will need to change all userPrincipalNames and Primary Email Addresses to the default .onmicrosoft.com domain before you can start removing email addresses. You will need to do that because you can’t remove a domain from a tenant to verify in another tenant until they are all gone. And I mean, all gone. Which brings me back to my second point, be sure you export everything first before you start deleting 😉

Last thoughts on email migrations

There’s a lot of work that goes into email migrations but the more time you spend ahead of a migration the less time it will require after you migrate. Hope these few tips will help you in your next migration. See more tips on Office 365 here.
Push Notifications For RSS Feeds with iOS

Background

In the growing age of Software as a Service (SaaS) applications it’s critical to monitor outages and service degradation. Most SaaS companies have a status page you can check, some offer ways to sign up for alerts to email or txt messages. Personally, I prefer RSS feed because I can centralize all my feeds into one place. Let’s take a look at a way to get push notifications for RSS feeds.
Feedly and IFTTT

When Google Reader met it’s demise I searched around for a few different RSS apps and came across Feedly. I’ve been hooked ever since! Along with Feedly is an automation service IFTTT – short for If This Then That. It’s a great way to automate actions between account services.

Setup

  1. In order to do everything below you will want to create accounts in both Feedly and IFTTT.
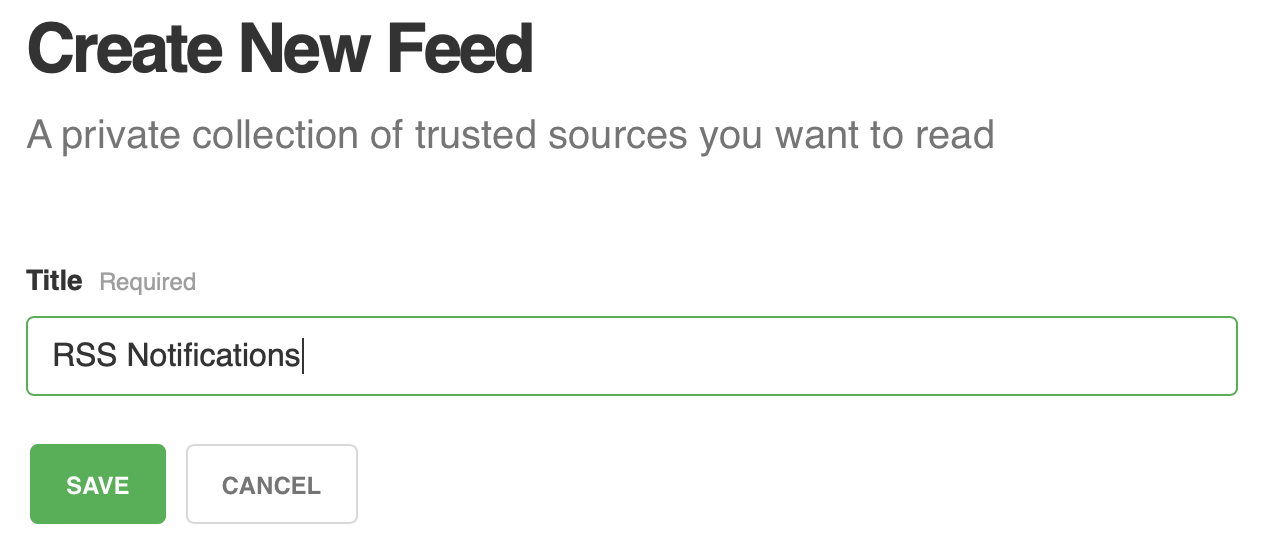
  2. In Feedly you will want to “Create a new Feed” and call it something like RSS Notifications. This will act as a category to subscribe to all your RSS feeds.
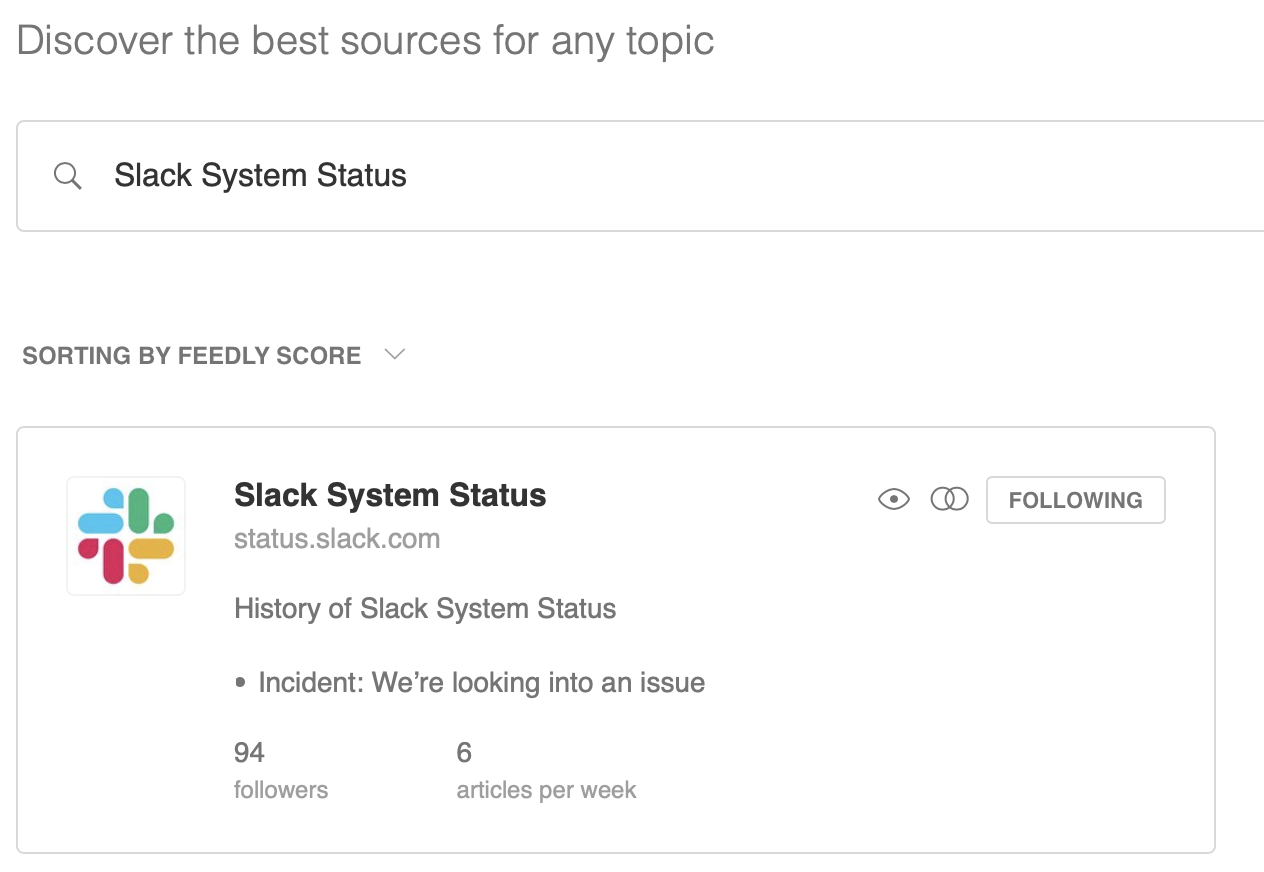
  3. Now go to “Add Content” and paste in the URL for the RSS feed you want to subscribe to. Add to your RSS Notifications feed category. For example: https://status.slack.com/
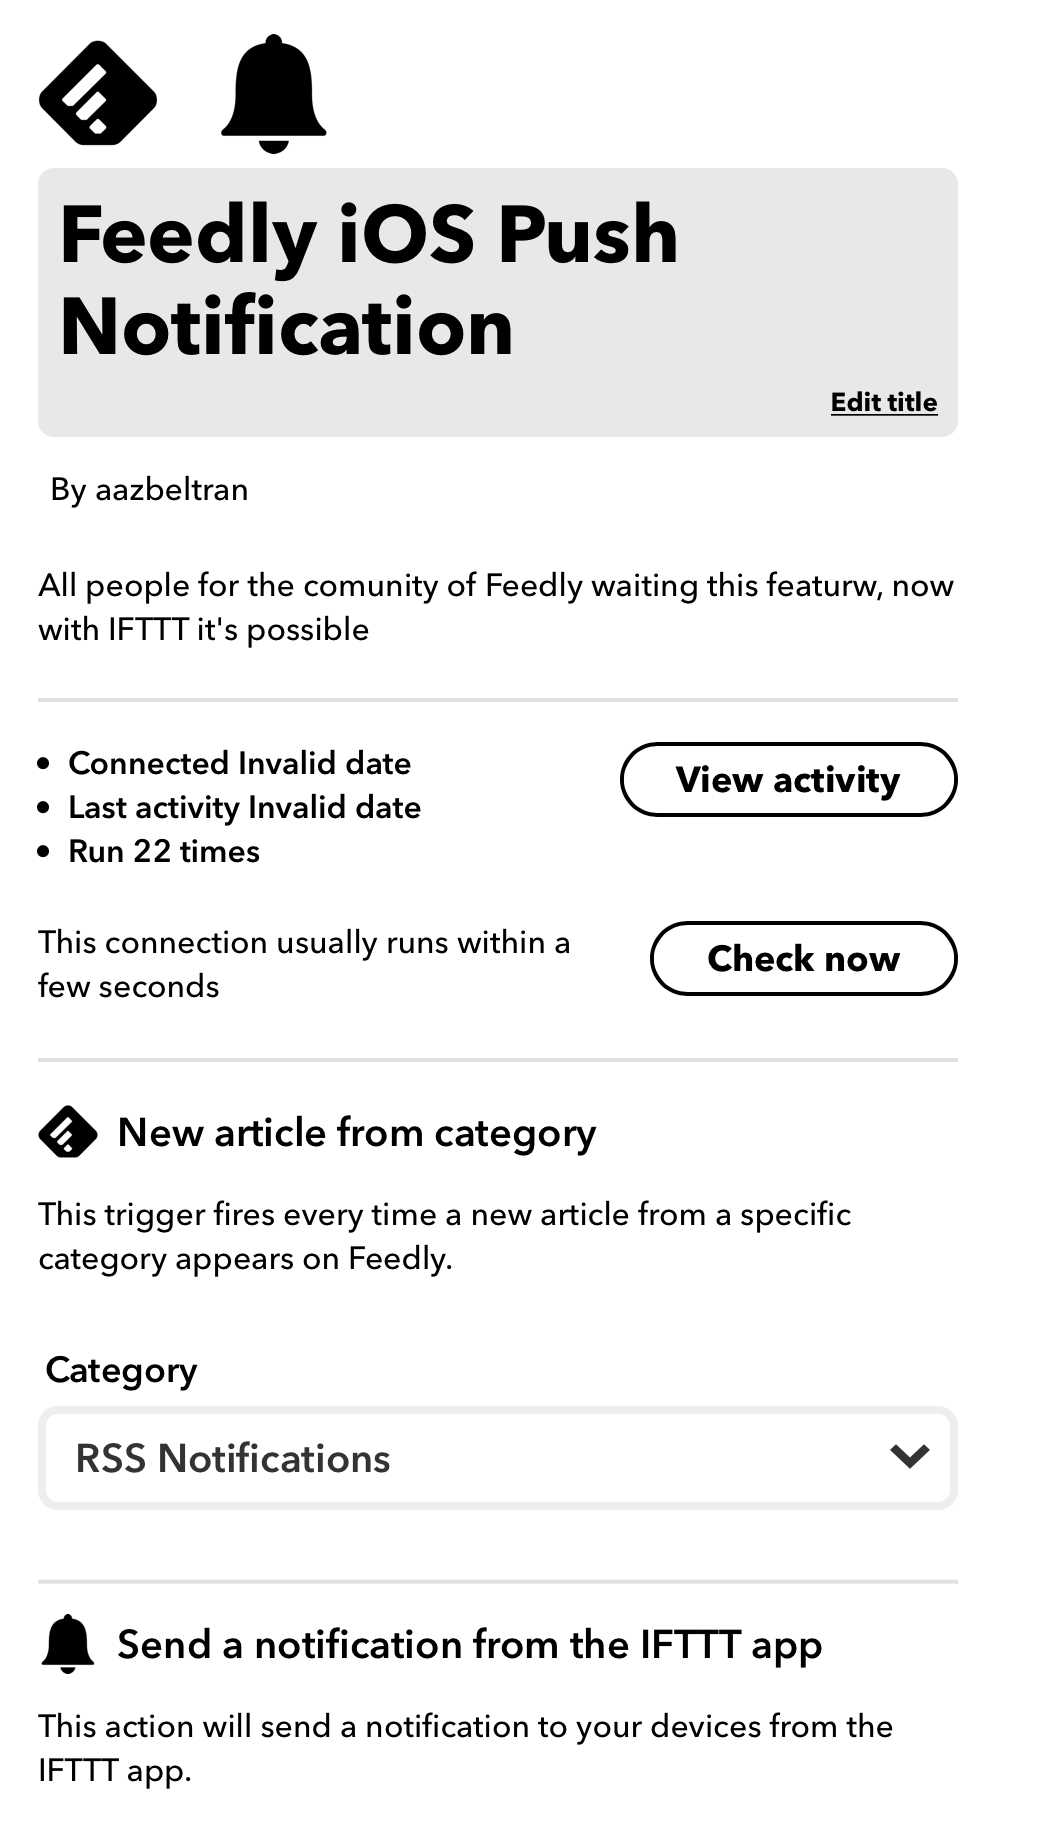
  4. After adding the RSS feeds you want let’s go to IFTTT, there is a specific applet already created you can use called Feedly iOS Push Notifications – connect this to the Feedly category you created and you should be good to go!

Summary

I hope these push notifications for RSS feeds help you stay on top of the services you have and know when to inform others that they should expect possible issues. Communication is key for any team or business!